Posts

Showing posts from April, 2020

Leaf Crowns & Wreaths
Image
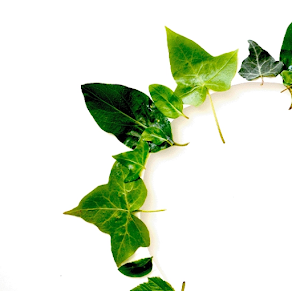
In this post, we’re going to be using leaves to make crowns and wreaths. If you’re not able to get out to collect leaves you can always draw leaves and flowers onto paper and cut them out. You will need: - Cardboard - Scissors - Glue - Leaves If your cardboard isn’t big enough to go around your head, you’ll need a hole punch and some string. Cut out a strip from your cardboard box. You can use a cereal box or something similar! Punch holes into the strip and tie string to either side. Make sure the string is long enough to reach all the way around your head Arrange your leaves onto the crown. And when the glue is dry, your crown is ready to wear! To make a wreath, you can cut out the middle of a paper plate, and arrange your leaves. If you don’t have a paper plate, use some cardboard and draw round a plate. Share your artwork with us by tagging @aspex_takepart and using the hashtag #AspexatHome
Playful Pegs with Jordan

Image
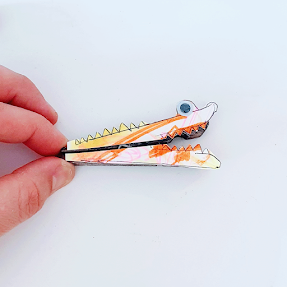
In this post, we will be making simple and playful peg animals with the help of Jordan!       Here is what you'll need: - Pegs - Paper - Pens - Glue - Scissors Firstly you need to draw around the peg in its open position. Next draw in all your animal/mythological creature details. Best to just keep to the head and facial details.             Ivy just wanted to keep hers simple and colour it in. So add in any colour and decoration. You can use lots of different craft materials if you have any. If not, think of things like tin foil, tape, flowers, grass and other things you have around the house you can stick or tape down. You will then need to cut your animal out. As you can see I have cut Ivy’s in half so I can stick the top and bottom separately. This will allow them to move.       Next, add glue to the peg or your cut out and stick them together. You can also use tape or string to stick/tie the bits onto the peg. Here is Ivy’s Playful Peg creation. She

Window Galleries

Image
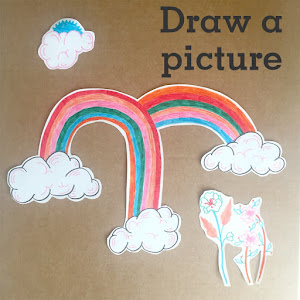
In this post, we are going to be making gallery displays for our windows. You can design these to look however you want! Draw the images you want to put in your gallery - I made a rainbow and some colourful flowers and a sun.  Tip: stick to the same few colours to make all your pictures tie together. Stick your images into a window - you can use sticky tack or tape for this.       Another way to make pictures in your window is to use felt tip directly onto the glass. Remember to use washable, not permanent markers!       This gives a stained glass window effect - this is my rainbow reflected back into the room! To see your pictures better from the outside, stick some white paper on the window as a background Share your artwork with us by tagging @aspex_takepart and using the hashtag #AspexatHome
Natural Paints

Image
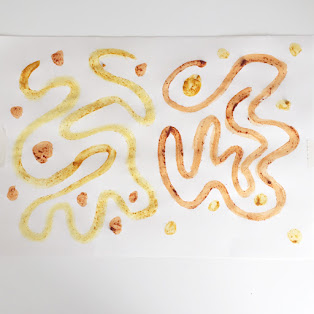
In this post, we are going to be using ingredients from our kitchen to make our own homemade paints! Here's what you'll need: - Paper - Water - A mixing bowl  - Some foods you can use to make paint:  paprika, turmeric, coffee grounds - Paint brush       Just mix whatever you choose to make paint from with water, into a watery paste & start your painting.       For the painting on the left, I used strained coffee and coffee with grounds in it for texture. Share your artwork with us by tagging @aspex_takepart and using the hashtag #AspexatHome
Paperback Books with Jordan

Image
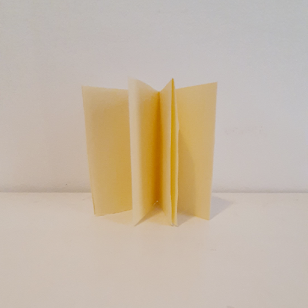
In this post, we're going to making our own books using paper with the help of Jordan! Hi everyone! It’s Jordan here! I am going to show you how to make a simple folded book that only uses paper and scissors. You can then fill it with anything you'd like - maybe what you have been up to or your goals. You can decorate it using anything you have around the house. You will need: - Paper - Scissors - Pens to decorate First, grab a sheet of paper. Bigger is best as you will end up with a bigger book. Though any sized paper will work for you. You can even try using envelopes or cut down cereal boxes if you don’t have spare paper. Fold your paper into 8 sections. Next, you need to cut the centre fold line. Make sure you cut it on the folded edge. Cut only half the line so you reach the centre of the paper. Stand your paper to make this shape, the middle will want to naturally fold in onto itself. Push everything to the centre. Fold the pages down to make a conventional

Love Letters

Image
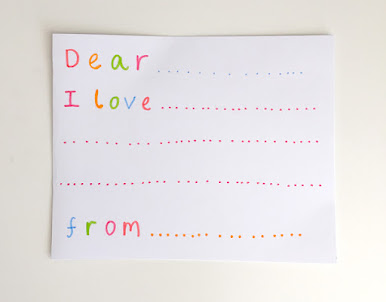
In this post, we're going to create cool cards and write love letters to send to your friends, family, teachers or neighbours! You will need: - Household objects - Paper - Pens - Glue Find objects around your home. You can use toys or household objects. Draw round them to create patterns. Here I layered outlines on top of each other and used lots of colours and patterns to make it bright.       To make it into a love letter, I filled in the letter template and glued it onto the design. You can use the letter template at the top of this page or make your own!        For this next one, I’m using a cereal box. I cut out a postcard shape, and used objects to create a pattern on the other side. I then coloured in the gaps, and glued a little piece of paper to the front with my love letter. Share your artwork with us by tagging @aspex_takepart and using the hashtag #AspexatHome
Ink blown trees with Alison

Image
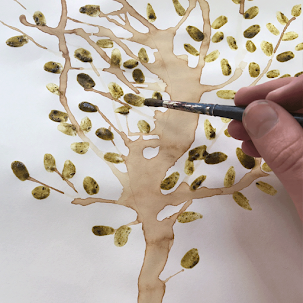
In this post, we're going to be making ink blown tree pictures and transforming them into spring trees covered in leaves with the help of Alison. This activity is inspired by artist Sarah Taylor-Silverwood Hi there, I’m Alison Carlier ! Follow this post to f ind out what you can use around the house to make your own ink and paint. Here’s what you will need: - Paper - A brush - A water pot - A straw - A teaspoon - Brown or black ink/or cold strong tea or coffee - Green paint/ or turmeric and charcoal - Or green paint or pencils If you don’t have ink at home try using cold strong tea or coffee instead. Ask a grown-up first before you raid the kitchen cupboards! And ask them to boil the kettle so you don’t hurt yourself. If you don’t have green paint at home try making your own mixing ground turmeric and ground charcoal and addin g a bit of water. Drop a blob of ink or tea/coffee onto your paper and blow with a straw. Imagine that you are making the trunk and bran

Loose Parts Art

Image
In this post, we are going to be using things from around the house to create temporary sculptures and take pictures of our creations. You will need: - Some random objects from around your home - A phone or camera Lay out the objects you found to create your very own sculpture.        You can make giant floor pictures or small tabletop scenes. Arrange into symmetrical circles to make mandalas, or make a pattern or a picture of your pet! Parents: remember to keep an eye on little ones when creating with small objects. Share your artwork with us on Instagram by tagging @aspex_takepart and using the hashtag # Aspex atHome