Embossing with Jordan
Hi everyone! Jordan here, I hope you are all well!
In this post, we will be making a family timeline using custom motifs that represent ourselves and embossing them. Scroll through to find out how to make it!
You will need:
- Thick paper or card
- Scissors
- A spoon
- Pen
- Tape
As well as these items, we need to use a clean kitchen or bathroom sink.
TOP TIP! This process works best on thicker paper!
Soak your paper to soften the fibers. Fill your clean sink with water about a finger's depth will suffice. Fully submerge your paper into the water and soak for a minimum 10 mins. You may want to add a timer.
Note! You may want to get stages 2 to 4 done within this 10 minute or so time scale. If not just leave your paper in the water until you are done.
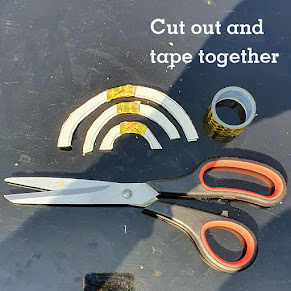
On your cereal box card draw your motif out 3 times. TIP! It’s best to keep your shape super simple, try to translate your image into a silhouette with clean edges as seen in the image.
Once drawn out cut out all 3 symbols and glue / tape them together as neat as possible on top of each other. If glued leave for 30 mins or so to help create the bond.
Grab two sheets of clean dry paper and place your wet paper in between them. Sandwich them together. Either using a rolling pin or the palm of your hand/fist work over the dry paper back and forth.
This removes all the surface water, once done for 1 minute, check your now damp paper for any visible surface water. If you can see some, re blott. Your paper should be limp, damp and flexible.
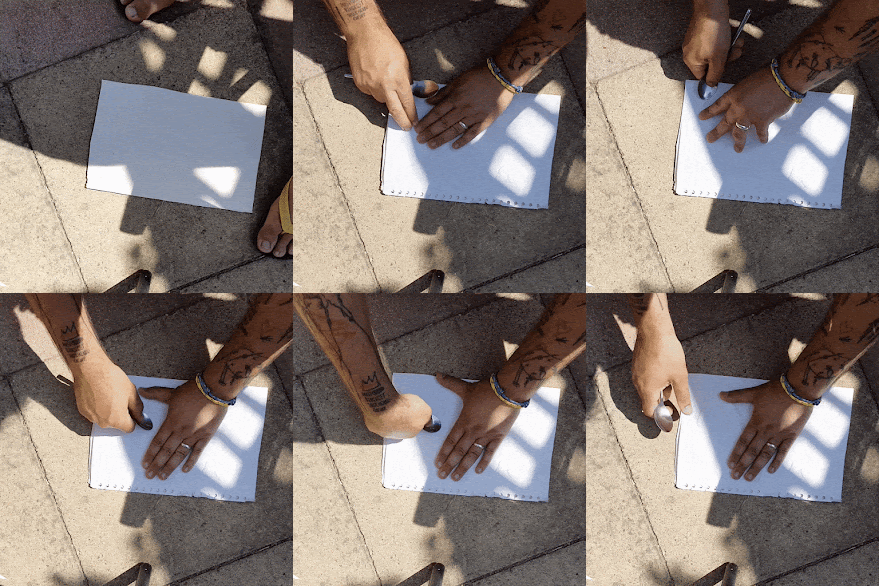
Now position your motifs 1 at a time under your paper and begin rubbing the spoon's edges softly around the circumference of your motif. You may want to use the curves of the spoon to really help forge the shape. Repeat for all motifs.
Don’t forget to share your artwork with us on Instagram by tagging @aspex_takepart and using the hashtag #AspexatHome.


Comments
Post a Comment